Send several records in one call
The route "Artikel Webshop" writes every item to the shop in a call of its own, through the step
Artikelexport. A full run over the 2,418 items of the master data therefore makes 2,418 calls. The
shop offers a batch endpoint for items, POST products/batch, which creates or changes up to 100
entries at once.
At the end, Artikelexport sends 50 items per call, and the job details of an item show which call carried it out and which part of that call it was.
What you need
- The permission Routes at the level Full — see Permissions.
- For activating, the permission Activation, or someone who has it.
- A target system that accepts several records in one call. For a REST target, also from its documentation: the endpoint and one example each of the request and the response.
- Starting point: Configuration → Routes → the route → Mapping tab → select the writing step → Step settings → Batch call tab.
Xchange saves every entry automatically. It takes effect in operation only with the activated configuration snapshot.
1. Send batched
- Set Call to Batched. Records per call starts at 100.
- Under Records per call, enter how many records go out in one call at most. For Artikelexport it is 50 — the shop accepts 100 at most.

If the step writes to SAP Business One, you are done here — continue with step 3. The Service Layer knows the batch call by itself. What the hint under Records per call means is in Routes — Mapping.
2. Describe the call
A REST target expects the batch call in its own form. Under Batched, the Request and Response fields appear for this.
- Under Endpoint for creating, enter the method
POSTand the pathproducts/batch; under Endpoint for updating, the same. Artikelexport writes with Create or update, and the shop accepts new and existing items through the same endpoint. - Choose Paste sample request and paste a call from the shop's documentation, with at least one entry. Likewise, paste a response with Paste sample response.
- Choose the fields from the samples: under Request
items,keyandfields, under Responseresults,index,status,itemandproblem.
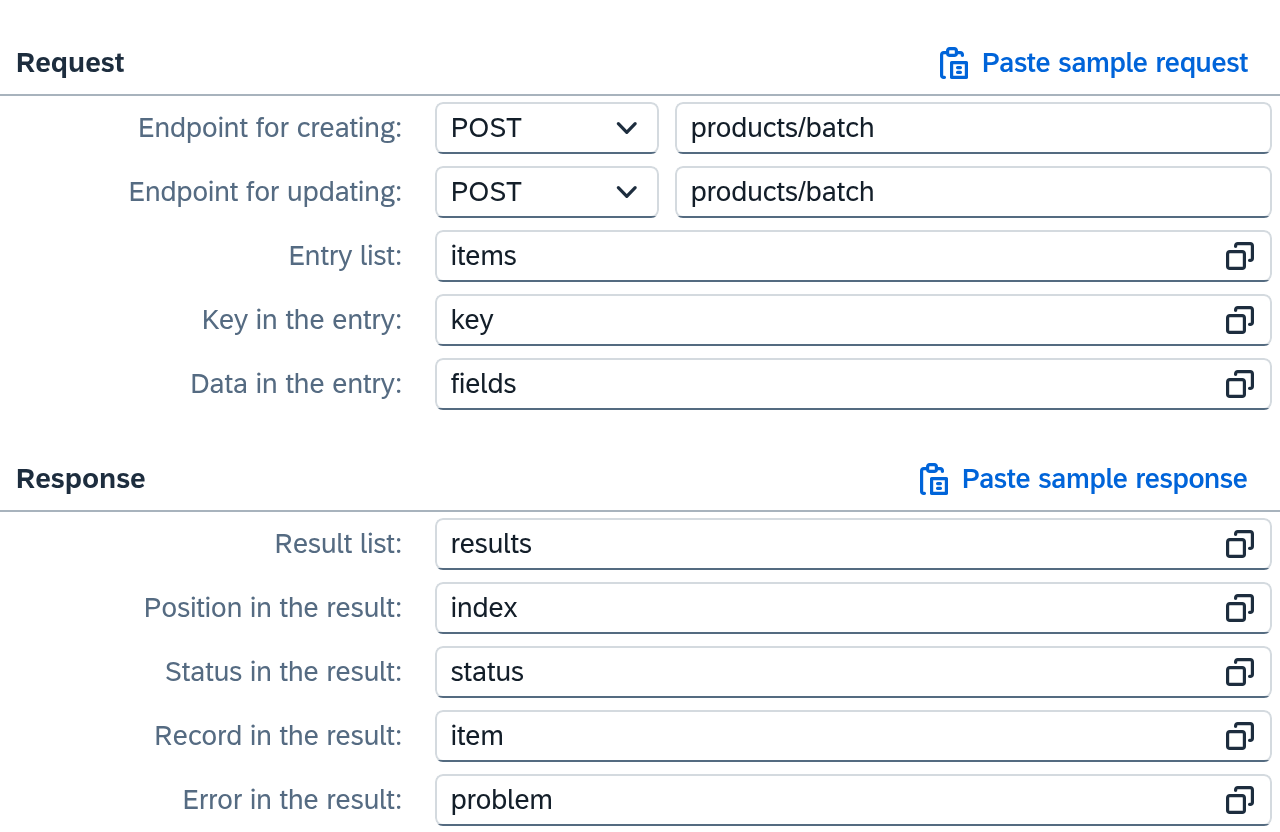
If the connection knows the target's field structure, choose the path from the list instead, and Xchange fills some of the fields itself — see Routes — Mapping. What each field defines is there.
3. Validate and activate
Choose Validate. On this tab it mainly reports two things:
| Message | What to do |
|---|---|
| The batch call has no endpoint — enter "Endpoint for creating" or "Endpoint for updating" | Enter the path from step 2. |
| Required | Fill in the marked field — for example Status in the result or Key in the entry. |
All messages of this tab are in Routes — Mapping. Then activate the configuration snapshot — see Validate and activate.
4. Check it on the job
After the next run, open a job of the route in the History, in the example ARM-4711. The item
already exists in the shop and is changed. Under Sent message there is
PATCH products/p-5f2c91 with the record as it would have gone out on its own, and beneath it
Sent in a batch call (POST products/batch), part 12 of 50.
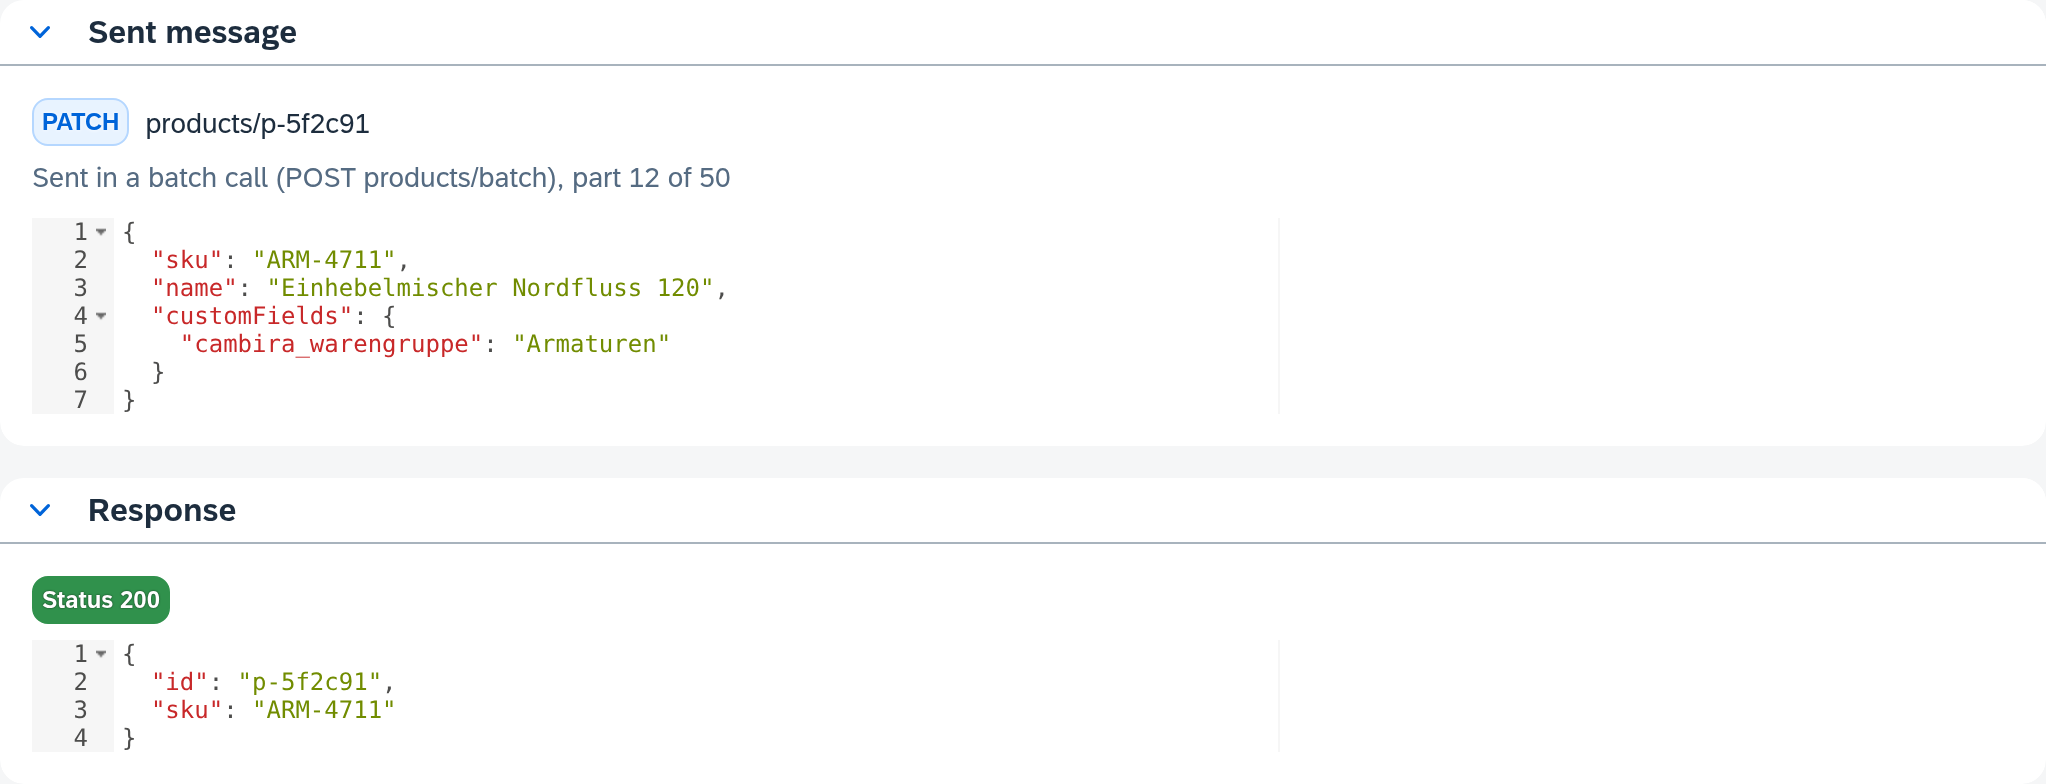
The response beneath it is the item's own, not that of the whole call. When only one job is waiting, it too goes out batched, as part 1 of 1.
Every record remains a job of its own, with its own result and its own retry. How Xchange assigns the results of a call and what happens after an open outcome is in Routes — Mapping.
Send singly again
Set Call back to Single and activate the configuration snapshot. The batch call settings are kept and only take effect again under Batched.
What comes next
Whether the first run with the batch call went through cleanly is shown in Check whether a run went through cleanly.
See also
- Find and trace a single job (guide) — find and open a single record in the history
- Routes — Mapping (reference) — every field of the Batch call tab, results and messages
- History (reference) — the sent message in the job details
- Writing to the target system (core concept) — write intent and key of a writing step