Set up dispatch
A dispatch route transfers no business records of its own. It receives an incoming message and forwards it, based on rules, to one or more processing routes — e.g. a mixed document message from the web shop, split by document type. This guide walks through creating the dispatch rules on the Dispatch tab.
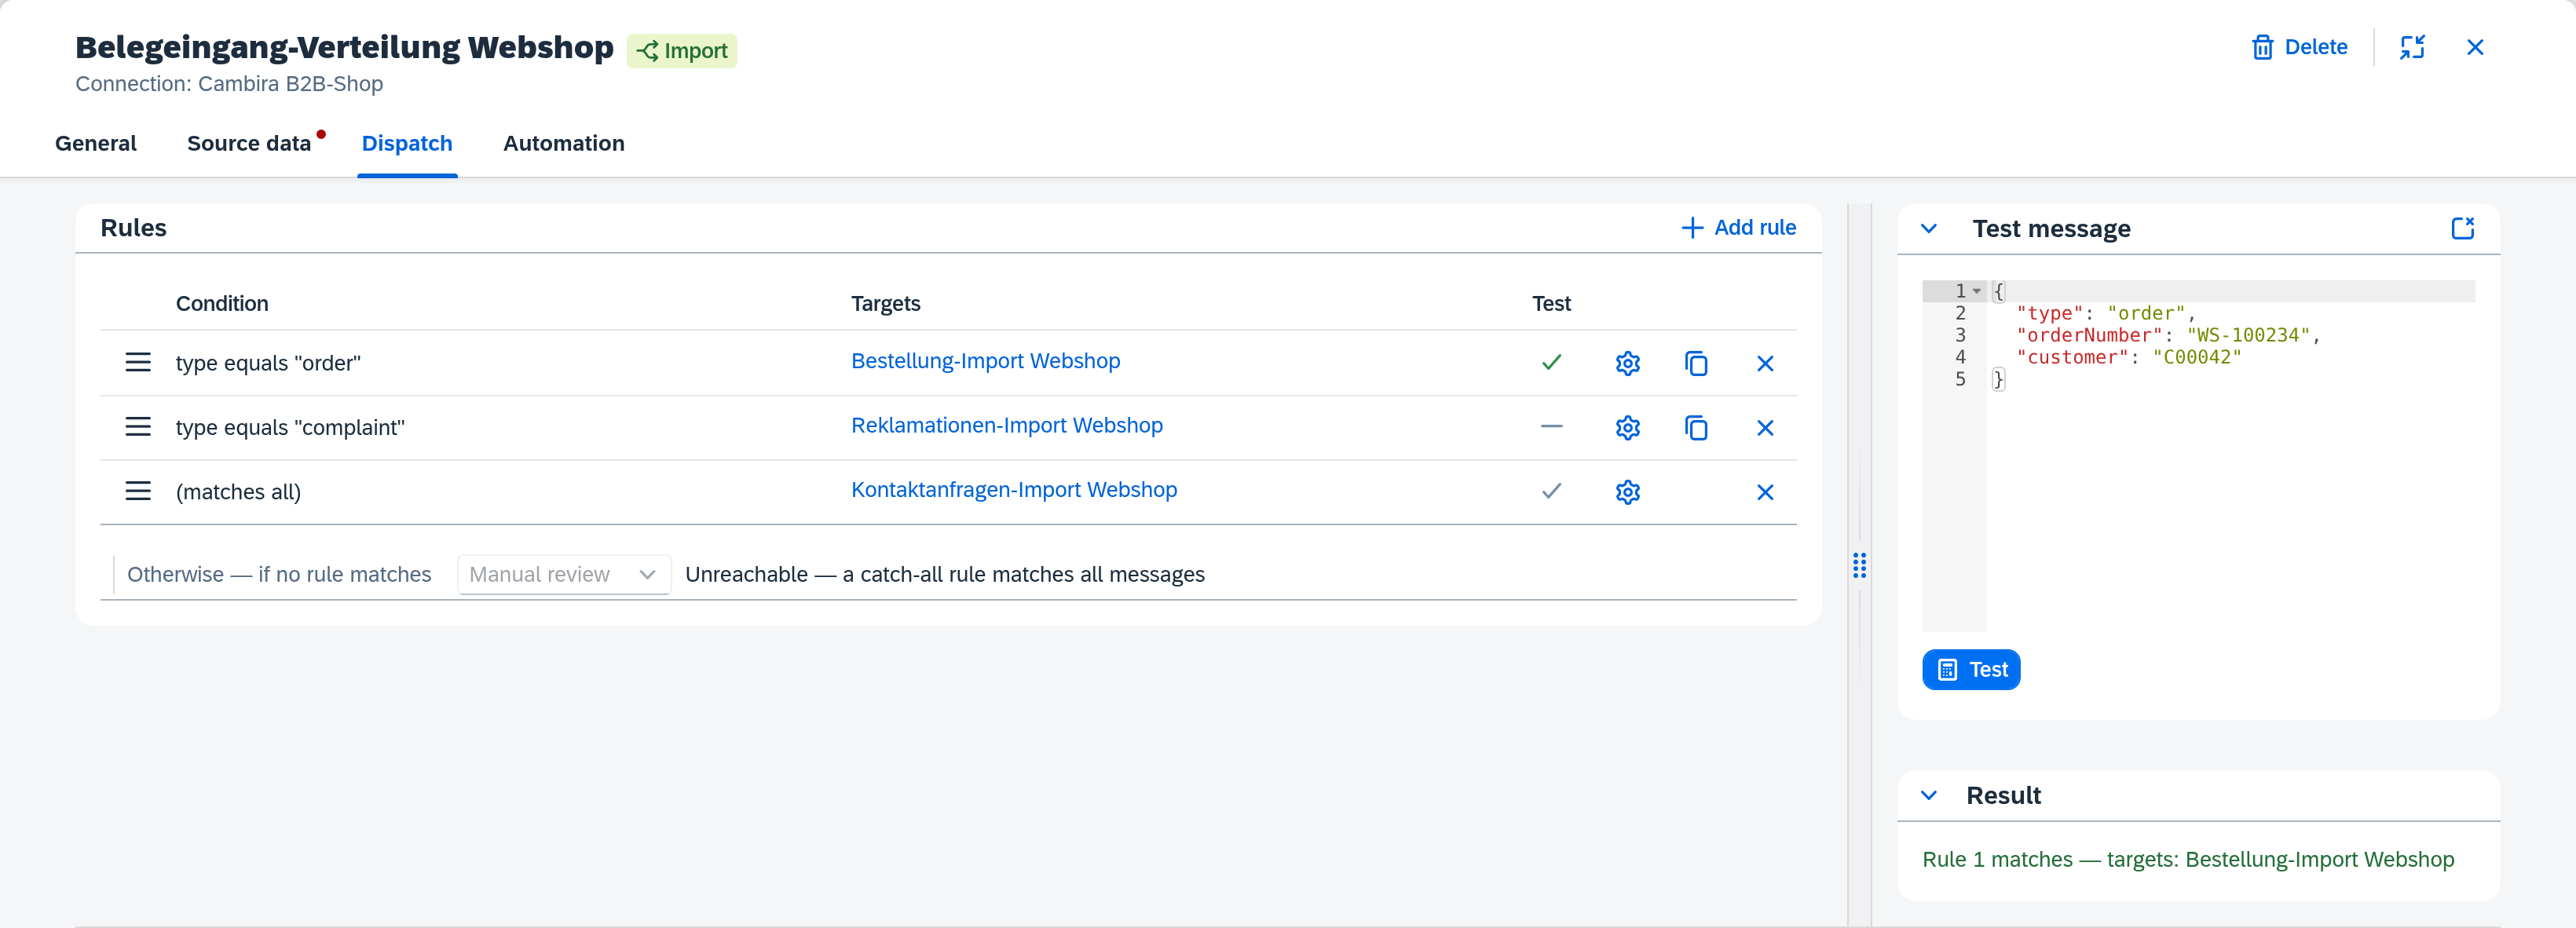
The running example is the route Belegeingang-Verteilung Webshop: it sorts incoming messages by the field type — orders to the route Bestellung-Import Webshop, complaints to Reklamationen-Import Webshop, everything else to Kontaktanfragen-Import Webshop.
What you need
- A dispatch route (direction Import, type Dispatch) — see Create a route. Open it and switch to the Dispatch tab in the editor.
- The target routes: inbound processing routes on the same connection with the data origin Dispatch input. You can create them up front — or directly from the rule via New target route (see below).
Xchange saves every entry automatically. Your changes go into the draft and take effect only when it is activated.
Create a rule
Add rule creates a new dispatch rule. A rule consists of a condition (when does it match?) and one or more target routes (where does the message go then?). The gear icon on a rule row opens the rule details.
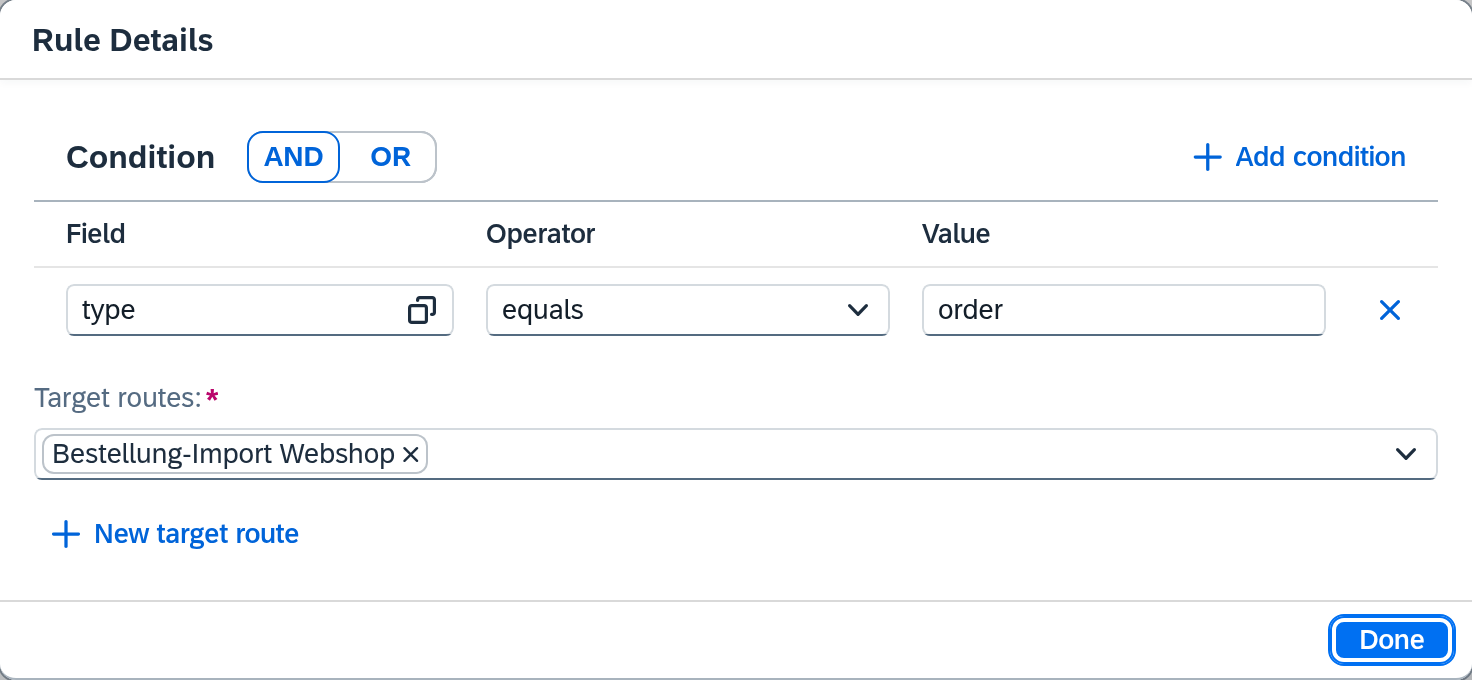
- Define the condition. Add condition adds a condition row. Pick the Field (a JSONPath into the incoming message, e.g.
type; the pick list is built from the test message and stays empty while none exists), an Operator — equals, not equals, is empty, is not empty — and, for the first two, a Value (e.g.order). Join multiple rows via the AND / OR button; a rule holds at most five conditions. - Choose target routes. Under Target routes, select one or more processing routes. Available are the inbound processing routes on the same connection as the dispatch route whose data origin is Dispatch input. If the matching route does not exist yet, create it right here via New target route — the dialog opens with the route type processing route plus connection, direction, object type and data origin pre-filled, and the new route is then selected as the target.
- Done applies the rule and closes the popover.
Important — the target route's trigger is wired automatically. As soon as a rule targets a route, that route automatically receives a trigger of type Dispatch input — you do not add it by hand. A route fed this way draws its data from the dispatched message; a timer or event trigger of its own is therefore not offered to it at all.
Order and further rules
Xchange evaluates the rules top to bottom and forwards the message to the first rule whose condition matches — later rules no longer apply. You change the evaluation order by dragging the handle icon.
A rule without a condition matches every message — a catch-all rule. It sensibly sits as the last rule and catches everything that no earlier rule matched.
No-match behavior
At the foot of the rule list, the Otherwise — if no rule matches selector determines what happens to a message that matches no rule:
- Skip — the message is not forwarded; the operation ends in the History with the status Skipped (condition).
- Manual review — the message is submitted for a business decision and appears as an open case under Clarification.
If the rule list already contains a catch-all rule, a rule always matches anyway — the selector is then disabled, and the note "Unreachable — a catch-all rule matches all messages" points this out.
Test the rules
On the right, you check the rules against a test message without processing a real message:
- Under Test message, enter an example in JSON format (e.g.
{ "type": "order", … }). If reference data from the source data is available, the field is pre-filled. - Click Test. Pending changes are saved beforehand — what is tested is always the saved state.
- Under Result, it shows which rule matched and which target routes it forwards to — or that no rule matches, then together with the configured no-match behavior. In each rule's Test column, an icon shows the outcome: green check = the selected rule, gray check = also matching, gray minus = not matching.
Activate
The rules take effect only once you activate the draft. Review it first via the Configuration Snapshots and then activate it. The full flow is described in the guide Activate configuration changes.