Track runs and clarify an operation
This guide walks through the day-to-day operation of an active configuration: start a run, follow its operations, and clarify a failed one. A run bundles the operations it produces — one operation per record. When everything goes smoothly there is nothing to do; only a failed operation needs your decision.
What you need
- An active route for something to run over.
- The three permissions in the Operations area — Execution, History and Clarification — one per matching page. Read is enough to view; the acting operations (Start run, Reprocess, Close) require the Full level. Your administration grants these permissions.
Step 1: Start a run
Open Execution from the navigation and select the route from the list. In the detail view, Start run immediately starts a run — independent of the automation switch and of the route's configured trigger.
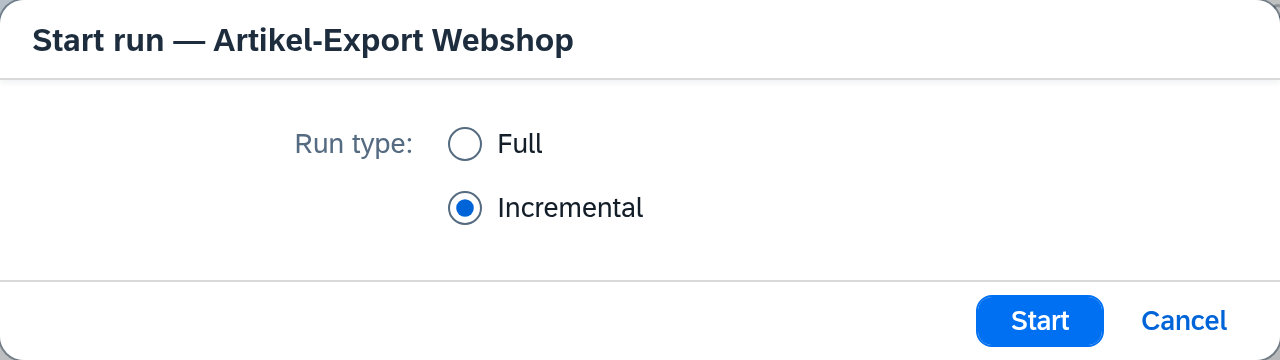
In the dialog you choose the run type:
- Full processes the route's entire data set.
- Incremental only the changes since the last run — available once the route has a change filter.
Confirm with Start. After the start, a confirmation shows the run identifier and offers Open in History — taking you straight into the next step, filtered to exactly this run.
If you only need to transfer individual records you already know — instead of a whole run — use Transfer individually in the same detail view and enter the business keys. This works even while the route's automation is paused. Details in the Execution reference.
Step 2: Track operations
The History shows the operations of all routes in one shared list, newest first. The list refreshes automatically as soon as a status changes — no reload needed.
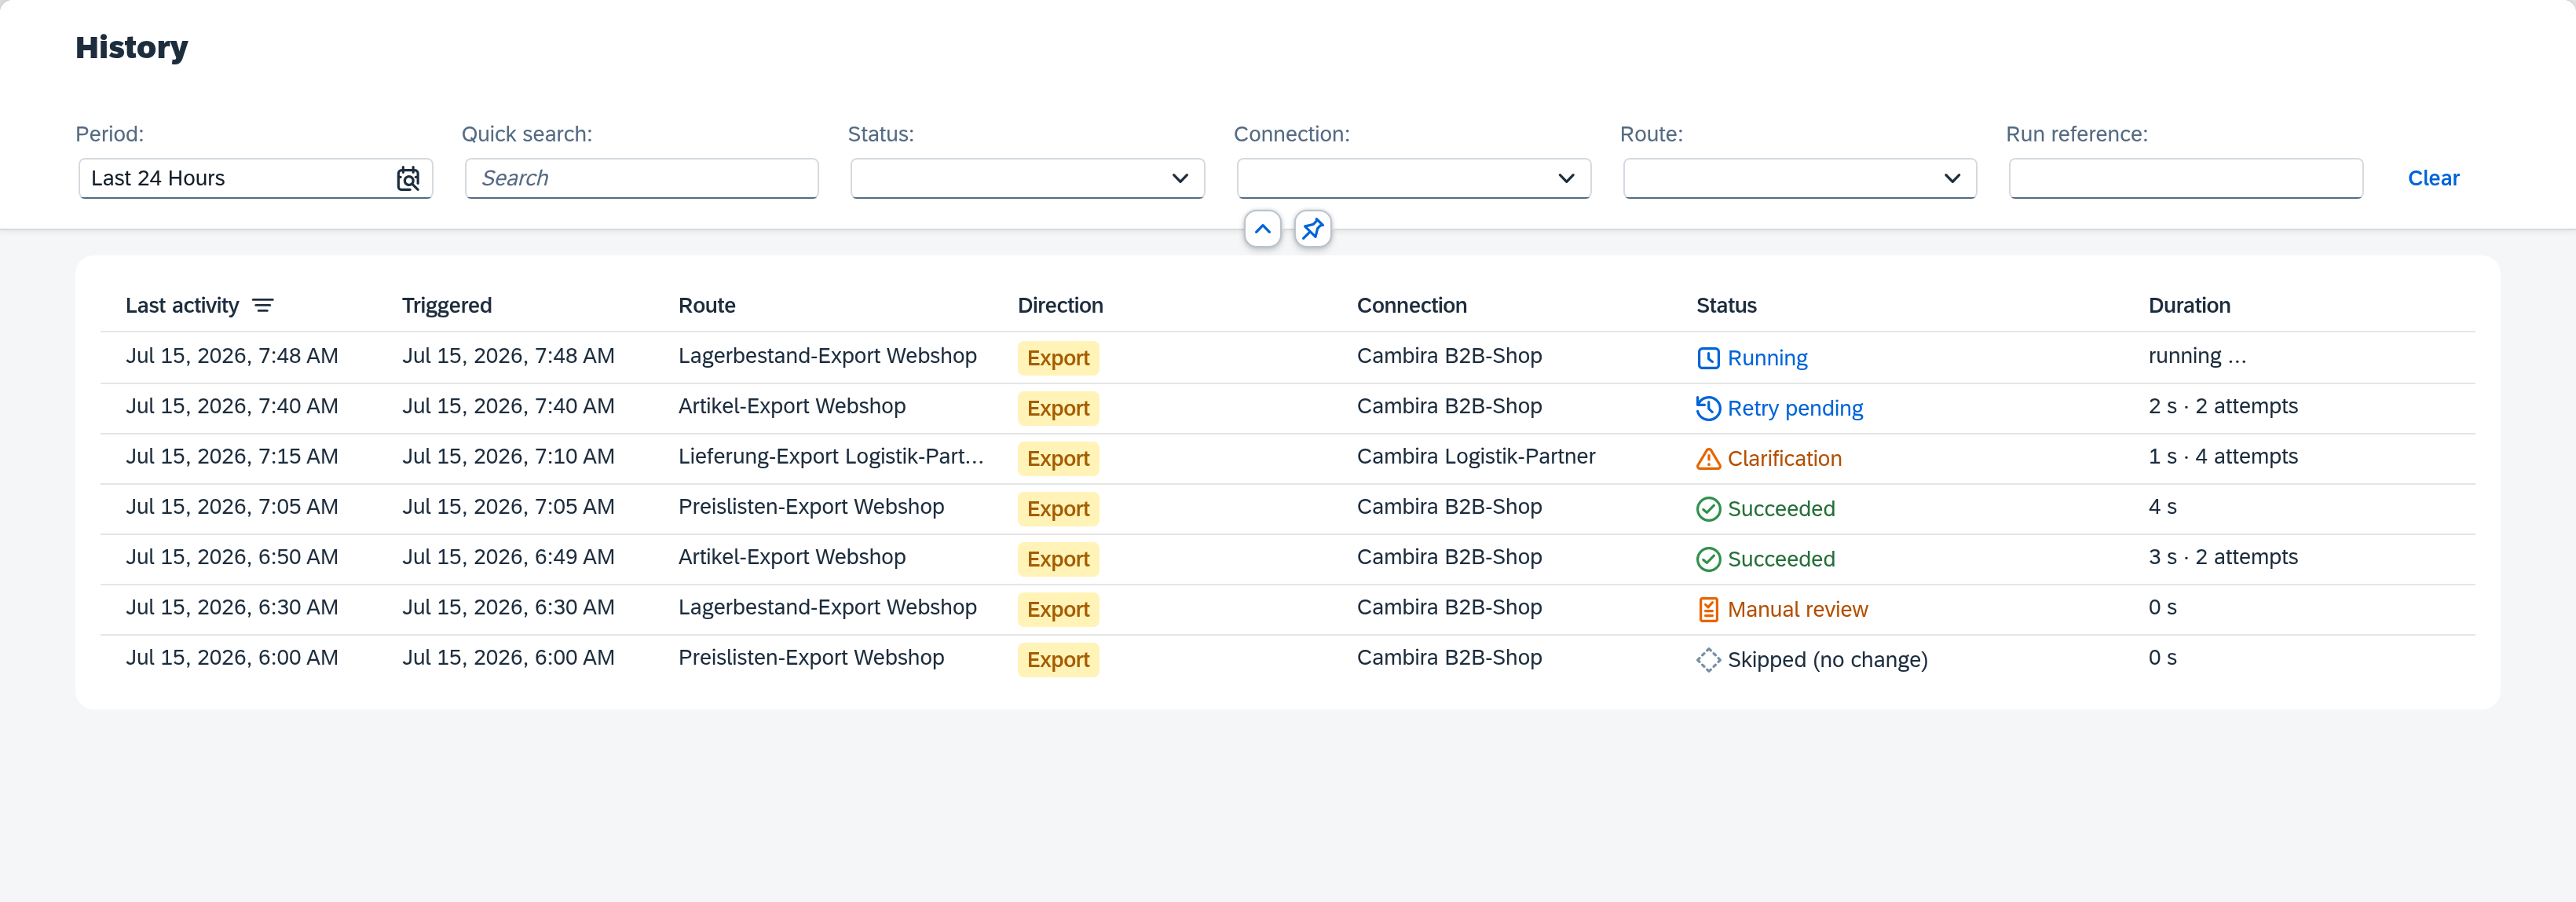
The status tells you at a glance what needs attention:
- green — completed successfully, nothing to do.
- blue — still running or waiting for a retry.
- orange — Clarification: the automatic attempts are exhausted, the operation is waiting for you to act.
- red — failed; the operation was aborted for good, with no further automatic retry.
- grey — deliberately skipped (e.g. no change).
Clicking a row shows the operation's full raw record in the detail view. The complete list of all status values is in the History reference. The History is for tracing — a failed operation is acted on in the next step.
Step 3: Clarify a failed operation
When automatic processing of an operation has finally failed, it lands in Clarification. Usually all retries have been exhausted first; but where it is clear from the outset that another attempt cannot change anything — an incoming event without a business key, for example — Xchange files the case for attention directly, with no retry. A counter next to the menu item shows the number of open cases. Open the screen and select the entry.
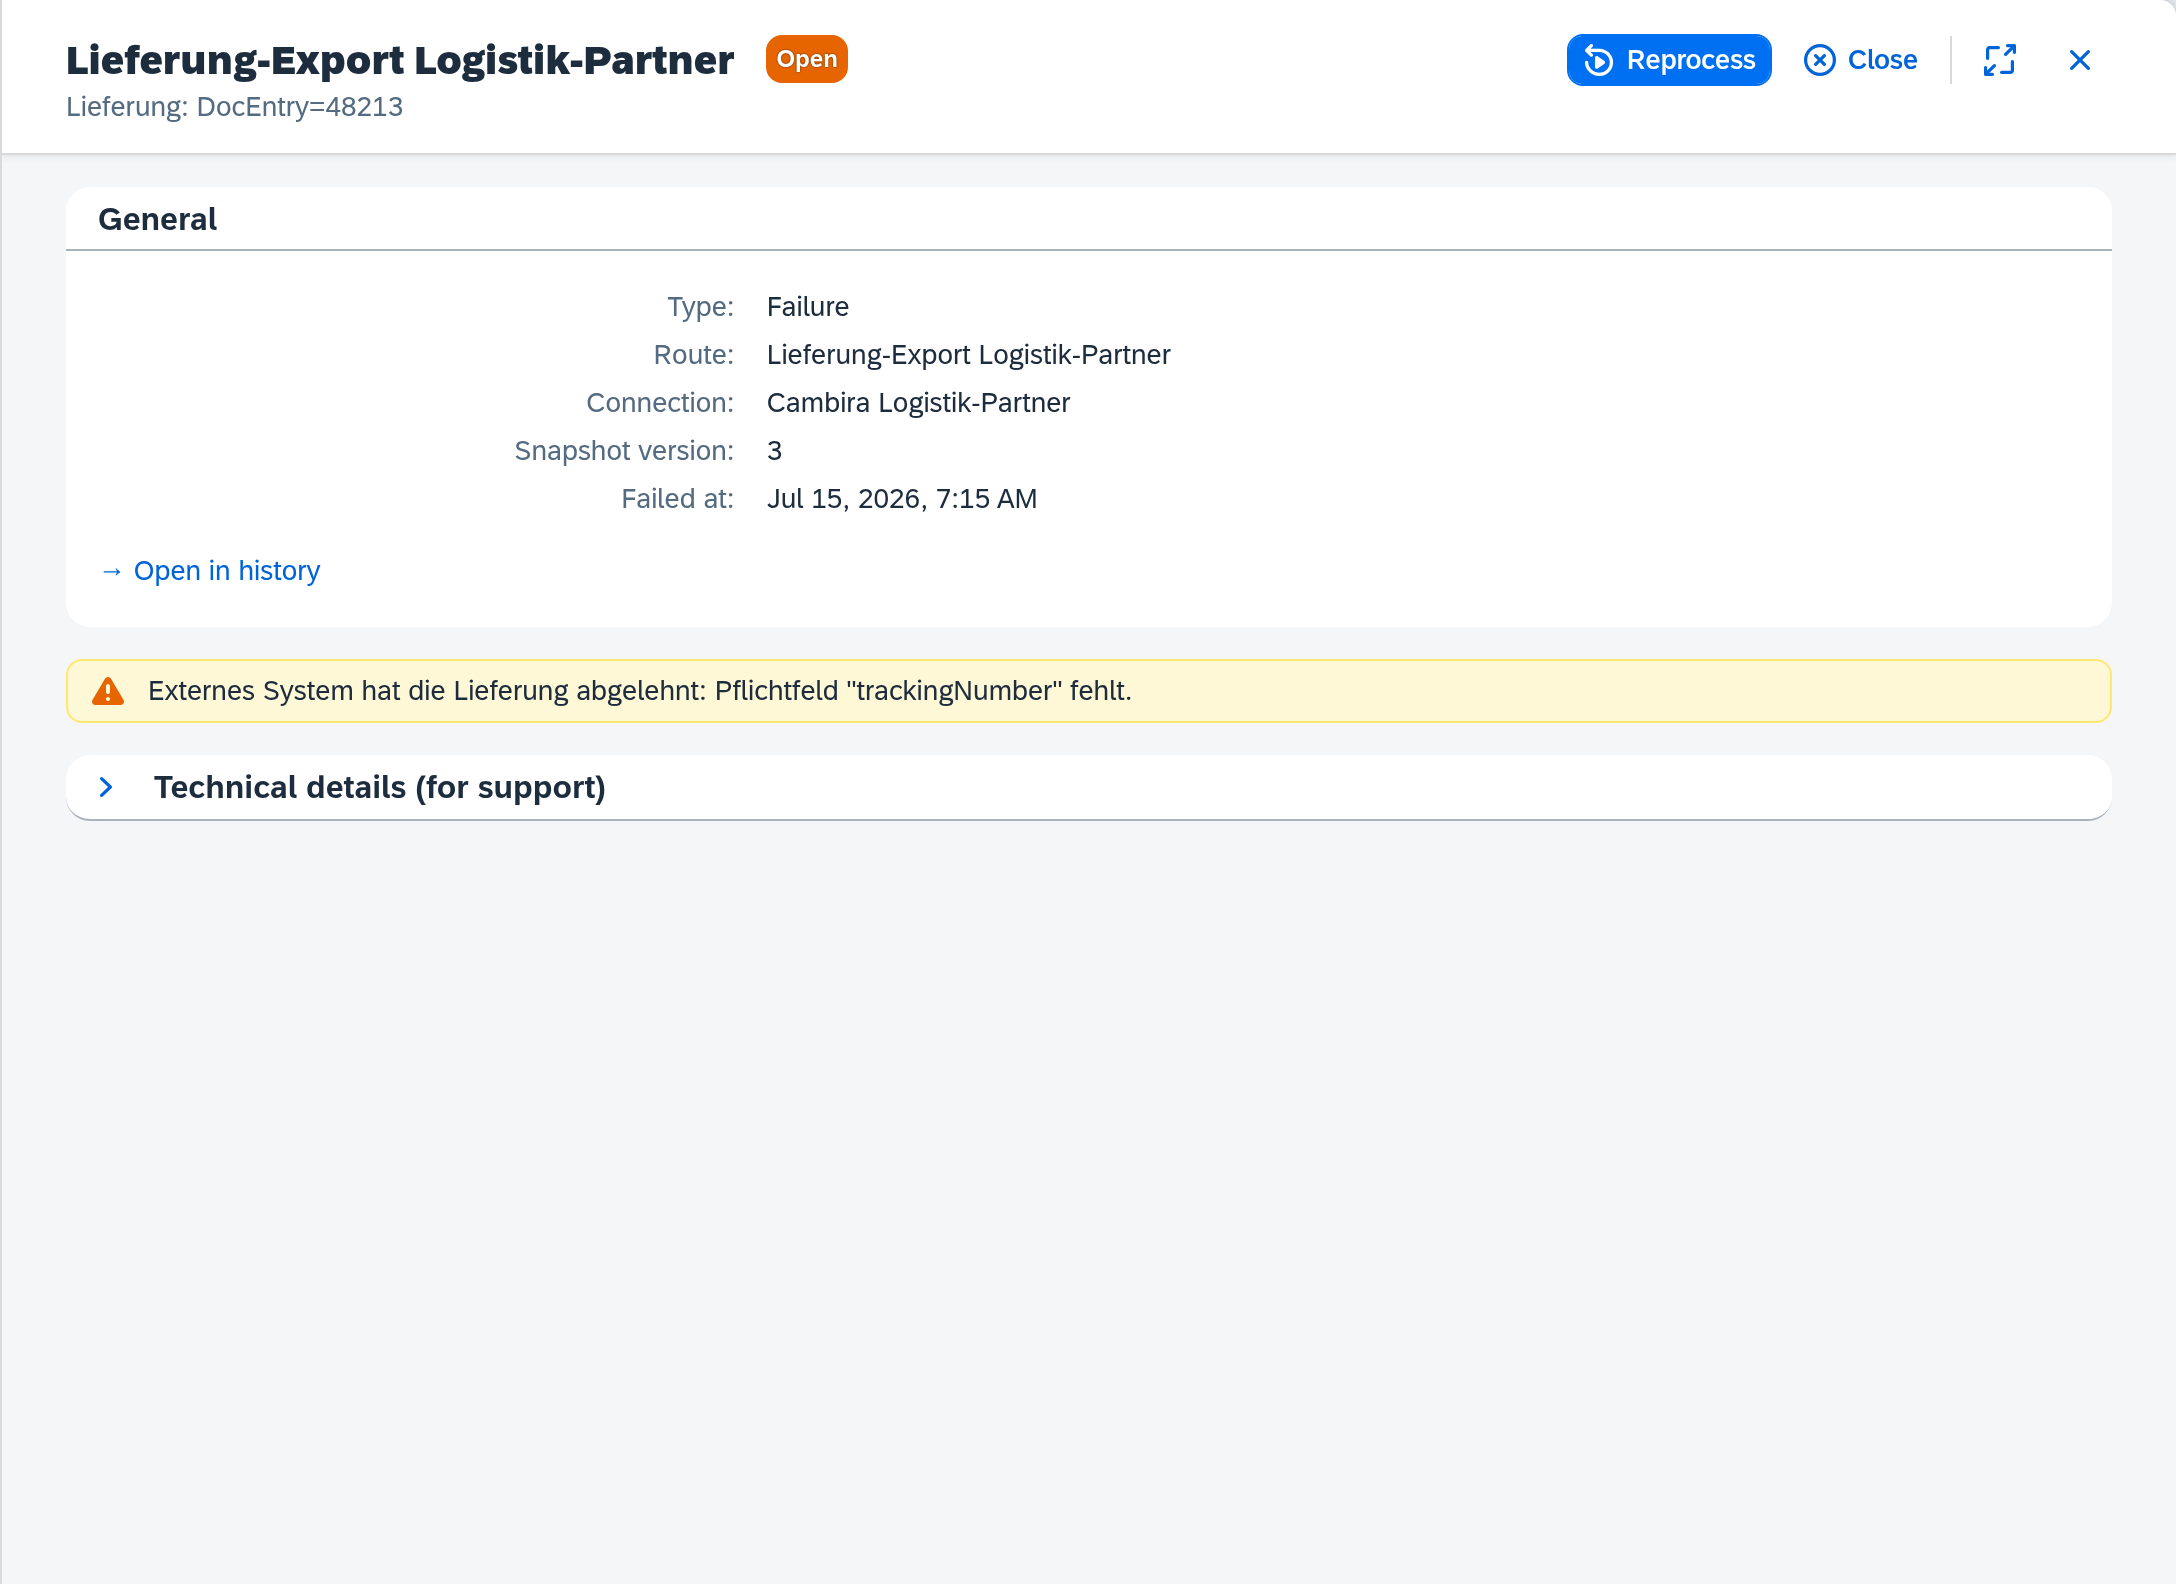
The detail view states the cause in plain text and — in the collapsible Technical details section — the error code and class for analysis. While the entry is Open, you have two options:
- Reprocess — starts a new processing attempt for the record. The entry switches to Reprocessing and stays on the work list until the new operation runs through: if it completes successfully, the entry switches to Resolved; if it fails again, a new open entry is created.
- Close — closes the entry without another attempt, when the record should no longer be transferred.
Reprocess uses the active configuration snapshot, not the draft. If you fixed the cause through a configuration change, activate the draft first — otherwise the operation fails again with the same cause.