Activate Configuration Changes
Every change to the configuration goes through a draft that must be deliberately activated. This guide walks through the complete path from draft to active configuration.
All steps in this guide take place on the Configuration Snapshots page — open it via the navigation in Xchange.
What you need
- A draft holding the changes you want to make active.
- The Configuration — Activation permission. Without it the actions Validate, Activate and Discard are not visible. Your administration grants this permission.
How a draft is created
A draft is created automatically as soon as you edit the configuration for the first time — e.g. by adding a route or editing a connection. There is always at most one draft at a time: all further changes accumulate in the same draft until it is activated or discarded. The draft does not affect the running system — it always uses the active state.
Step 1: Validate the draft
Click Validate in the draft area to start a full validation. The check covers required fields, references between routes and connections, and the logical consistency of the configuration.
The result appears directly in the draft area:
- On success the status switches to Validated — the draft is ready for activation.
- On failure the status switches to Contains Errors. Below the status, a list of every issue appears with the affected object and a short description.
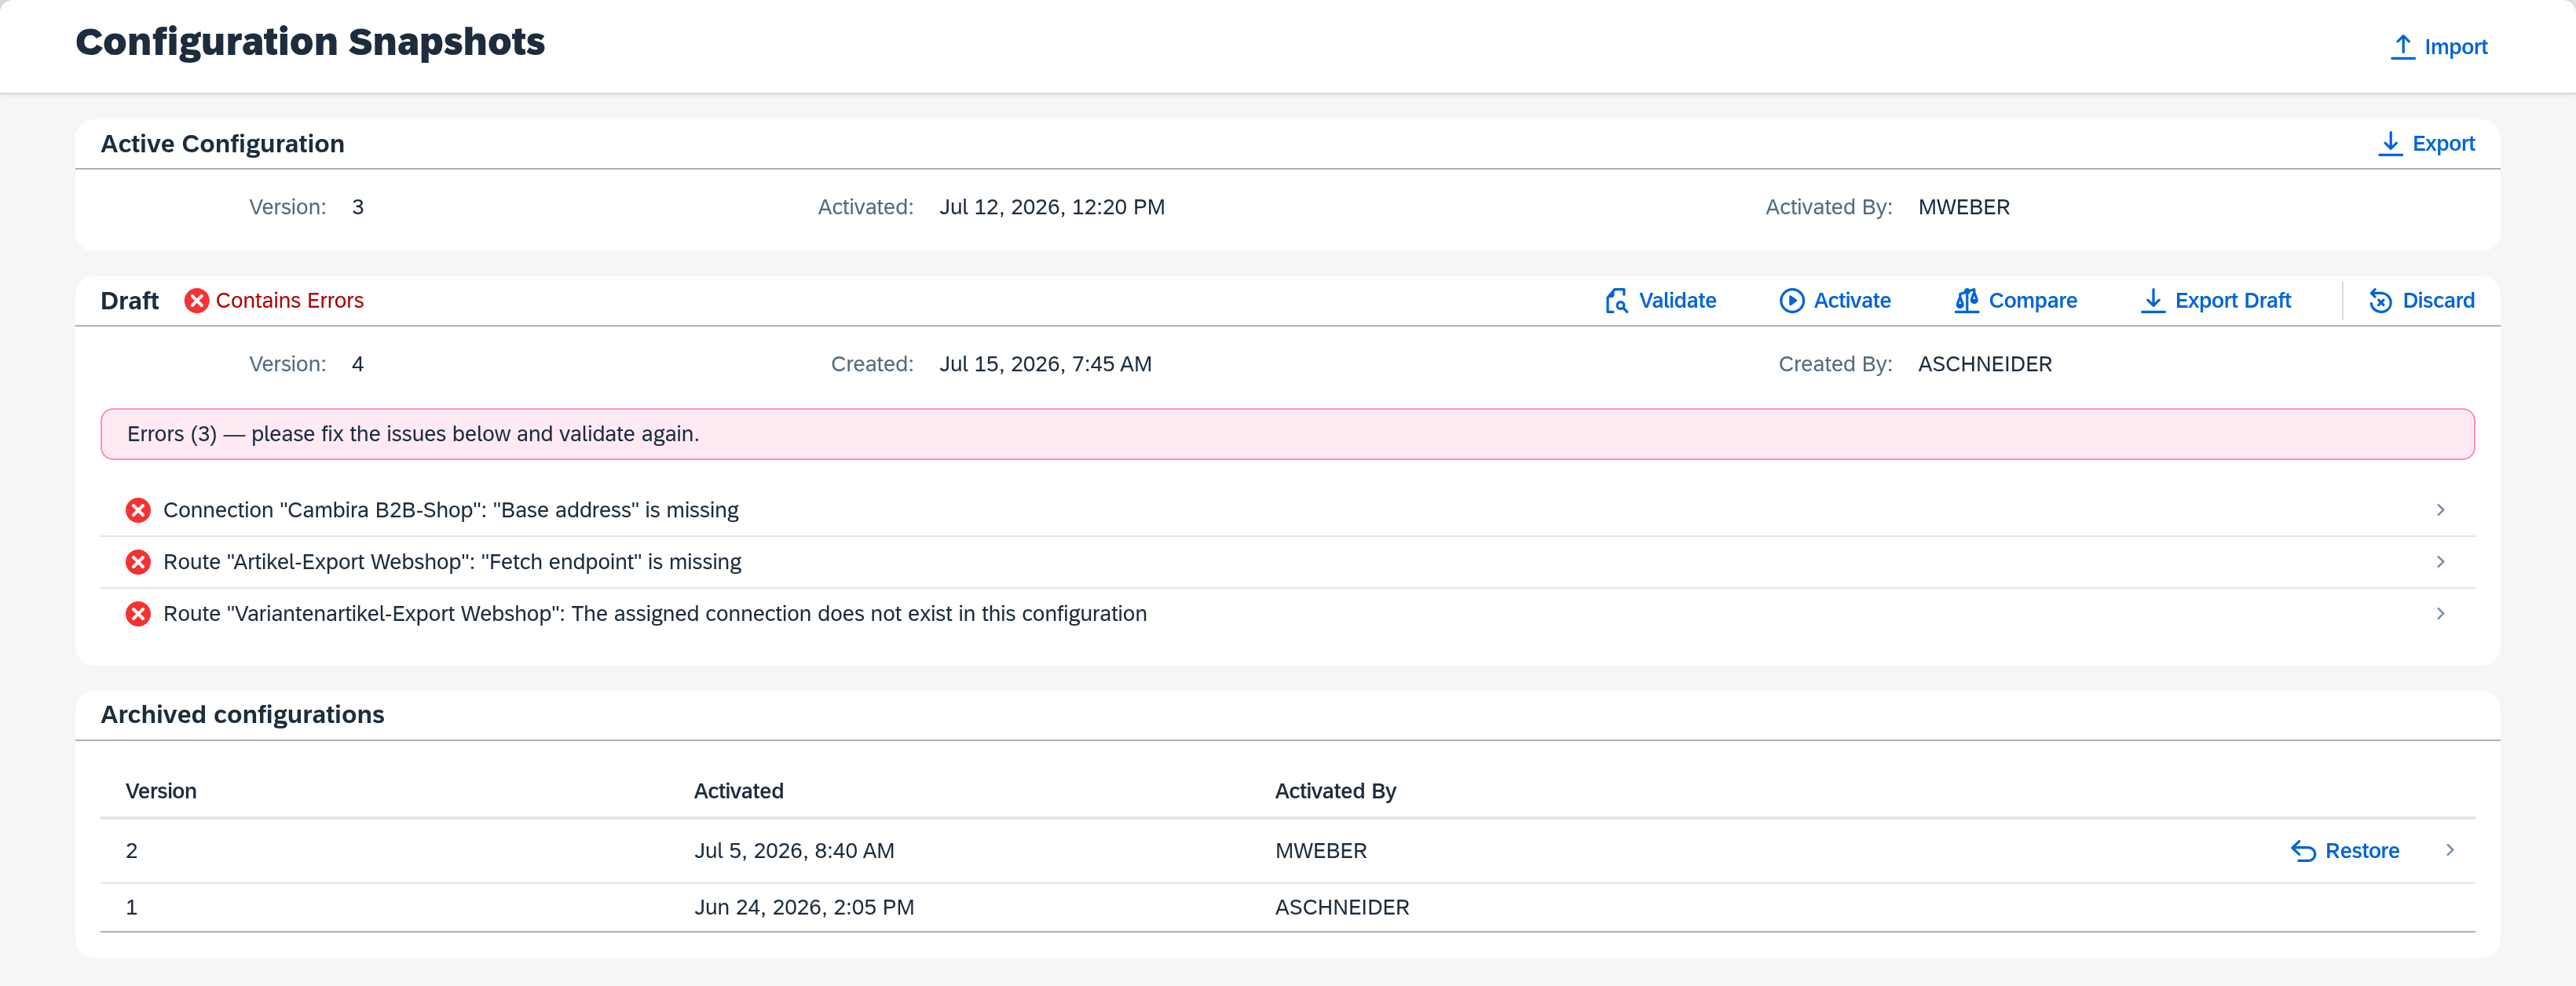
Fix validation errors
Every entry in the error list is clickable: clicking it navigates directly to the affected detail page (route or connection) and focuses the failing field. You don't have to search for where the error is.
Fix the configuration on the detail page, return to the Configuration Snapshots page, and click Validate again. Repeat until the validation passes without errors.
If the draft is edited again after a successful or failed validation, its status switches to Validation Outdated. The last validation result stays visible but no longer applies to the current content — run Validate again before activating.
Step 2: Activate the draft
Validation says the draft is consistent in itself — not what it changes. If more than one person has worked on it, or if it was started a while ago, hold it against the active configuration via Compare first: Compare changes before you activate.
Once the draft is in status Validated, the Activate button becomes enabled. Clicking it opens a confirmation dialog asking whether to set the draft as the active configuration, and noting that running operations are unaffected.
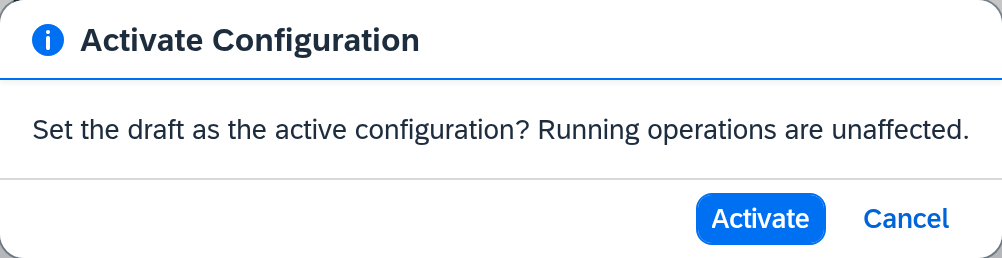
After confirming, the system promotes the draft to the new active configuration. The new version number and Activated / Activated By values appear immediately at the top of the page. The draft is consumed — new changes will create a fresh draft.
Operations that are already running when activation happens finish using the configuration they started with. The new configuration takes effect starting with the next operation.
Discard the draft
If you decide not to pursue the changes — e.g. because a route should be built differently — Discard deletes the entire draft. A confirmation dialog appears first.
There is no undo. All changes that were in the draft are lost after this action.
If the activation turns out to be wrong
The previously active state is not lost — it moves into the archive and can be fetched back in one step. How that works, and what happens to an open draft and the validation result in the process, is described in Restore an earlier configuration snapshot.