The first connection
On the tour you saw the Connections area — this is where its first entry is created.
We go back to the beginning: Monday, March 16, 2026. Xchange has just been installed at Cambira Sanitärtechnik GmbH, the system status reports Operational, and the lists of connections and routes are empty. A. Vogt connects the online shop first.
The goal is a passed connection test.
What you need for it
Two things, and both come from the target system:
- the base address at which it can be reached — for Cambira's shop
https://shop.cambira.example.com/api, - the credentials Xchange uses to sign in there. The shop expects OAuth 2.0, that is, client ID, client secret and the token endpoint. They are issued by whoever runs the target system.
Request both before you start. You can get as far as the test with the address alone; the test needs the credentials.
Create the connection
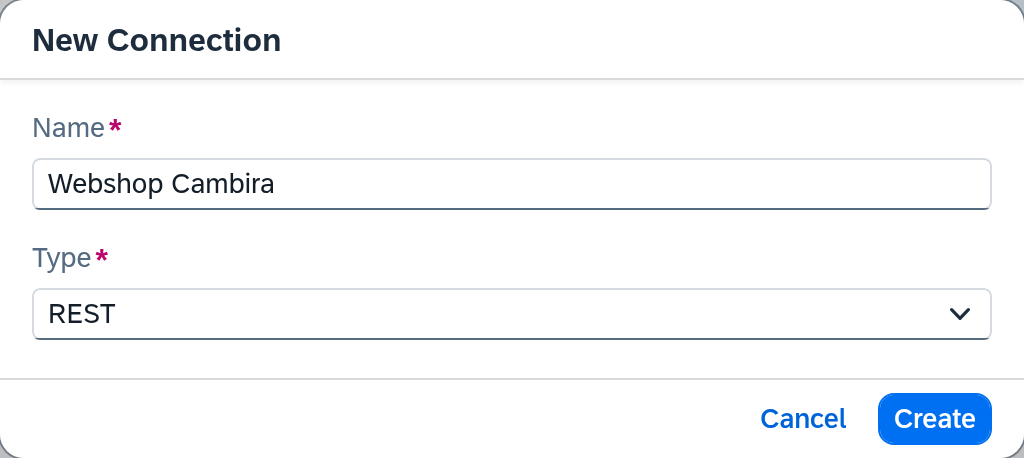
- In the menu under Configuration, open Connections.
- Select New Connection.
- Enter
Webshop Cambiraas the name. - Select REST as the type — the shop offers a REST interface.
- Create.
The connection is now open on the right; you enter the address and the sign-in next. From now on, the type can no longer be changed.
Xchange saves every entry on its own. At the bottom, the autosave bar keeps pace and shows Saving…, then Saved. The only exception is the client secret: you confirm it with a separate Save button.
Enter the address

Under Technical configuration, enter https://shop.cambira.example.com/api in
Base address.
This is the root for all calls. Where Xchange later fetches items from or where it writes them to is decided by the route — relative to this address.
Store the sign-in
In the Authentication section, select OAuth 2.0 as the Authentication type. Below it, Token endpoint and Client ID appear; enter what you received for them from the shop.
Below the two is the Client secret, initially in the state Not configured:
- Click Replace next to it. An input field opens.
- Enter the client secret and click Save.
The state changes to Configured. Xchange stores the client secret encrypted and afterwards shows only this state.
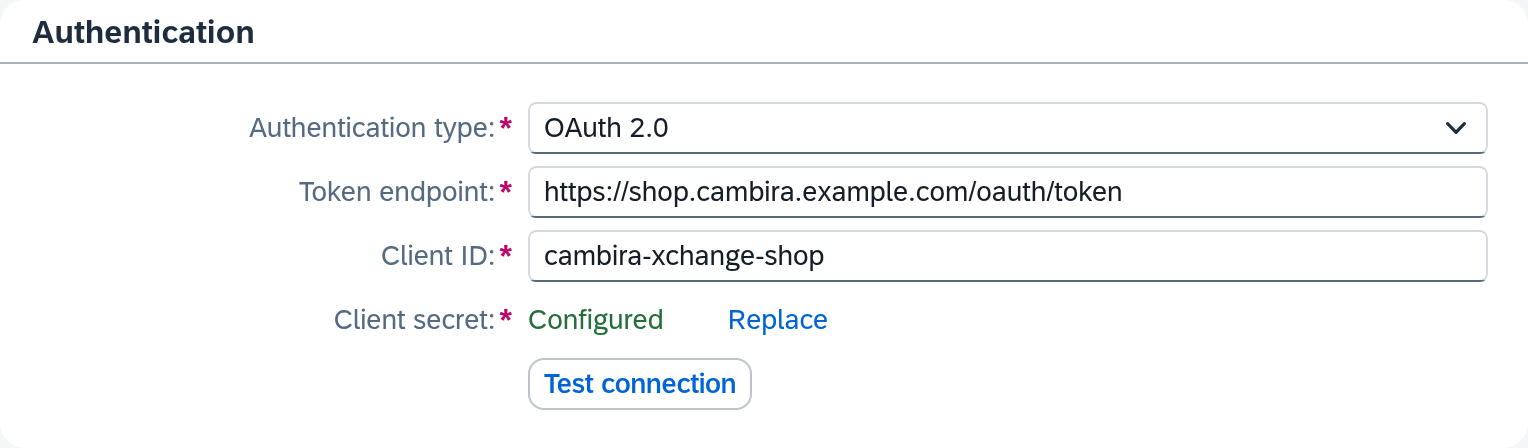
Which other authentication types there are and which fields each one requires is described under Connections.
Test
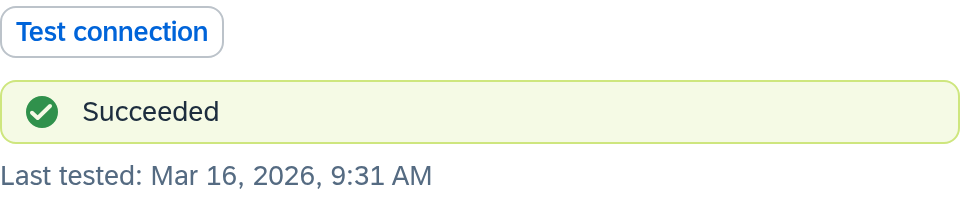
Select Test connection.
Xchange first checks whether the required entries are present and then calls the target system. If Succeeded appears afterwards, Xchange has reached the shop and signed in. Below it, the connection records the time as Last tested.
If the test failed, the cause appears in its place — Address not found points to the base address, Sign-in failed to the credentials. Correct the field and test again. All results in detail: Connections.
The result also counts later: when the draft is validated, Xchange checks how the last test turned out.
What comes next
The connection is in place; next, you build the first transfer on it: The first route.
See also
- Connections (reference) — every field of this screen
- Connections (core concept) — why a connection is separate from the route